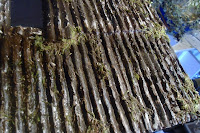
Making A Corrugated Metal Roof: Part 3
Since my project is supposed to be a very abandoned brick building, I wanted to add a lot of debris and greenery on the roof. However, this whole process can be skipped if your project isn't as (pleasantly) dilapidated as mine.
The first thing I wanted to do is add the greenery so I bought a bag of Forest Natural Sheet Moss and a plastic stem plant that I don't know the exact name/brand of. Here's the thing with natural moss: it looks amazing...for about 2 days. Eventually the green begins to turn brown and the fluffy bits begin to become thin and twig-like. Which is fine for my roof. This is what it looked like after adding just the moss:
Oops, wrong Moss.
To adhere the moss, I squeezed some Tacky Glue onto my fingers and rolled a piece of moss until it became mushy. Then I pasted it into the corners of my roof. Since it was mushy, it almost went on like clay. Most people over the age of 4 wouldn't do it this way, but I wanted big lumps of condensed moss because, as I mentioned, the moss will shrivel.
My next step was to add some dirt and debris, so naturally, the best way to do this is to add actual dirt and debris. You can experiment with different types of stuff you find outside. I looked for materials that I knew wouldn't age, so stay away from any live plants.
For this specific roof, I went into my driveway and scooped a cup of dirt and rocks, officially making me the neighborhood crazy lady. I then sifted the dirt with a colander that had holes big enough to separate the dirt and little rocks from the bigger rocks. Here's what I ended up with after sifting:
Perfectly-sized pebbles! And dirt. Next, I added some Matte Mod Podge sporadically onto the roof and sprinkled the dirt mixture.
After sprinkling, I took a soft brush and brushed away the extra dirt. If you've ever made glitter crafts, you should have no problem here (although the dirt isn't as sparkly or fun as glitter).
Finally, to combat the brown moss, I still wanted some greenery so I bought this fake stem plant:
And then cut it into smaller pieces:
I glued the pieces onto the moss sections to fill up the greenery:
And there you go! Spray seal with matte finish and done. All that work to make a crusty, old roof. Yay!
Some extra tips I would suggest are to stay conscientious about what glue finish you use, which is why I make sure to specify "matte" in my descriptions. You don't want gloss where gloss doesn't belong. Also, be warned that my method for this roof, similar to my method in living, is MESSY. Don't be afraid to make a mess especially when your project calls for it.
The following pictures are of the finished roof. See how the moss bits began to change?


Je dak ziet er prachtig uit.
ReplyDeleteGroeten Xandra
Hello Maria,
ReplyDeleteIt lkooks absolutely fantastic. Incredibly realistic.
hugs,
Giac
Looking great Maria, wonderfully realistic!
ReplyDeletebuen trabajo!
ReplyDeleteThat is really amazing, Maria!
ReplyDeleteLove you work, it looks very realistic.
ReplyDeleteThis is definitely a masterpiece! When I started to read your first blog regarding this, I thought this will be a difficult project because making a roof in real life is very hard, and I thought it will be the same when you make a miniature of it. But I was wrong. I found it interesting when I followed the rest of this blog. Well, it’s worth it! You inspire me to do a project that is as beautiful as this. I just hope it’ll come out like this. I’m keeping my fingers crossed. Anyway, I’m looking forward to learning more ideas from you. :)
ReplyDeleteAllyson Sunde
Kate Moss? LOL! ^__^ You had me going there for a second, thinking this was an actual roof. You did so well on this project that it actually looks like a real one. Just a little trivia: Applying zinc sulfate directly on the moss on a dry roof would kill it after 3 to 4 weeks of wet weather. Anyway, keep us updated on your future projects!{Roslyn Petermann}
ReplyDeleteI agree with Roslyn; your project almost fooled me! Haha! It's so realistic! It can be a good idea if you want your metal roof look vintage and aged. @Roslyn: I think that was the reason why most of the metal roof is made of zinc. It's to prevent the formation of moss when it was soaked with rain.
ReplyDeleteRichard Boles
Thank you for this article. Personally, I think this material is great. I agree with much of your information here. It also motivates me to learn more. I await the next article with great anticipation.
ReplyDeleteJons Roofing
It's incredible how the moss bits began to change, great article Mari!!!
ReplyDelete